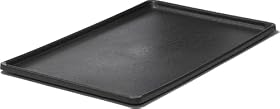
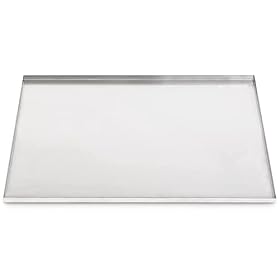
A replacement tray can refresh a wire crate, but crate pans are not universally interchangeable. Measure the old tray, verify the crate brand and dimensions, and check the lip, corners, handle, and material before buying.
Replacement tray for a wire crate
A replacement tray is usually the simplest way to fix a cracked, warped, stained, or chewed wire dog crate. The important detail is compatibility: wire crates that look similar may use different tray dimensions, corner shapes, lip heights, or pull handles. Measure the existing tray and compare those details with the replacement listing before ordering.
How to choose the right replacement tray
1. Measure the old tray
Remove the tray from the crate and measure:
Outside length: Measure from the longest exterior edges.
Outside width: Measure across the shorter exterior edges.
Tray depth: Measure from the bottom surface to the highest part of the raised edge.
Corner shape: Note whether the corners are square, rounded, or cut at an angle.
Handle or finger slot: Check whether the tray has a front handle, recessed grip, or no handle.
Use the tray’s outside dimensions rather than the crate’s advertised size. A crate described as a particular size may have a different interior opening depending on its brand, door design, frame, and wire spacing.
If the old tray is badly distorted, measure the crate’s interior opening as a second reference. Do not assume a tray that is slightly larger will bend into place; it may catch on the frame or prevent the crate door from closing.
2. Check the crate manufacturer and model
If the crate has a brand label, model name, or product number, search for a replacement tray made for that exact crate. This is generally more reliable than matching only a nominal crate size such as small, medium, or large.
A manufacturer-specific tray may have details that are easy to miss, including:
A particular corner radius
A raised or lowered front edge
A molded pull handle
Channels that fit around the crate frame
A nonstandard length or width
If the original tray is unavailable, compare the replacement’s listed dimensions with your measurements and look closely at the product photos. Ask the seller for exact outside dimensions when they are not provided.
3. Confirm how the tray sits in the crate
A wire-crate tray normally slides beneath the wire floor and rests on the crate frame. It should sit flat without rocking, bowing, or leaving a large gap along the sides.
Before buying, check whether the replacement is designed to slide in from the front or the side. Also verify that its raised lip will clear the wire frame and that the front edge will not interfere with the crate door or latch.
Plastic versus metal replacement trays
Plastic trays
Plastic is the most common replacement material. It is relatively light, easy to remove, and simple to wipe clean. A molded plastic tray can also be quieter than a metal pan when a dog shifts position.
Look for a tray made from sturdy, rigid plastic with a smooth, washable surface. Very thin plastic may flex under a large dog or crack if the crate is moved while the tray is installed.
Plastic may not be the best choice for a dog that persistently chews or digs at the tray. Inspect it regularly for cracks, sharp edges, or pieces that could be swallowed.
Metal trays
Metal can be a better option for dogs that damage plastic, but it may be heavier, louder, and more prone to rust if the finish is scratched or the tray is left wet. A metal tray also needs edges and corners that are finished smoothly.
Do not substitute a rigid metal pan unless its dimensions and fit are confirmed. A tray that shifts inside the crate can create pinch points or noise and may damage the crate frame.
Product prices and availability are accurate as of the date/time indicated and are subject to change. Any price and availability information displayed on Amazon.com at the time of purchase will apply to the purchase of this product.
Features that affect everyday use
Raised edges
A raised perimeter helps contain small spills and bedding. However, an edge that is too high can reduce usable floor space or make it harder for a small dog to step in and out if the crate door opens directly over the tray.
Smooth, rounded corners
Smooth corners are easier to clean and less likely to trap moisture, hair, or food. They also reduce the chance of sharp edges developing if the tray is damaged.
Pull handle
A front handle or recessed grip makes it easier to remove the tray without opening the entire crate. Make sure the handle does not protrude far enough to catch on the crate frame.
Odor and stain resistance
No tray material is permanently stain-proof. A smooth, nonporous surface is usually easier to clean than a textured one. If the tray has absorbed odor or remains discolored after cleaning, replacement may be more practical than repeated deodorizing.
Product prices and availability are accurate as of the date/time indicated and are subject to change. Any price and availability information displayed on Amazon.com at the time of purchase will apply to the purchase of this product.
How to measure when you no longer have the old tray
If the original pan is missing, measure the crate itself:
Remove bedding and inspect the support rails beneath the wire floor.
Measure the clear opening where the tray must slide.
Measure the distance between the crate’s interior side walls.
Check the front and rear corners for bends, brackets, or other obstructions.
Compare those measurements with the replacement tray’s outside dimensions.
Leave only the clearance recommended by the manufacturer or seller. Too much extra space can let the tray shift, while a tray that is too large may become stuck. If measurements are close, contact the seller before ordering and provide the crate’s exact dimensions and photos of the old tray area.
Cleaning and maintenance
Remove the tray before cleaning it. Use warm water and a mild pet-safe detergent, then rinse and dry it completely before returning it to the crate. Follow the tray and crate manufacturer’s cleaning instructions, especially if using a disinfectant.
Avoid placing a cracked tray back in service. A crack can expose sharp edges, leak onto the floor, or allow a dog to chew and swallow fragments. Check the tray after moving the crate and after any incident involving heavy chewing or impact.
A washable crate mat or pad should fit inside the tray without forcing the tray against the crate walls. If a pad bunches up and blocks the door or causes the dog to lose footing, choose a better-fitting option rather than folding excess material underneath.
When a replacement tray is not enough
Replace the entire crate, or have it professionally assessed, if the wire frame is bent, the door no longer latches securely, welds are broken, or the crate rocks after assembly. A new tray cannot correct a damaged frame.
If your dog repeatedly destroys trays, consider whether the crate is the right setup for unsupervised use. Remove damaged parts promptly, supervise introductions to any replacement, and follow the crate manufacturer’s safety guidance. A qualified veterinarian or behavior professional can help with persistent destructive behavior, anxiety, or attempts to escape.
Quick buying checklist
Before purchasing, confirm:
The replacement tray’s outside length and width
Tray depth and raised-edge height
Corner shape and front-edge design
Handle or pull-slot placement
Plastic or metal construction
Compatibility with your crate’s brand or model
Whether the tray slides in from the front or side
Return policy in case the fit is not correct
The safest choice is an exact replacement listed for your crate. If that is unavailable, an aftermarket tray can work when its dimensions, shape, and clearances match the original closely.
FAQ
Are wire crate trays universal?
No. Wire crates use different tray lengths, widths, corner shapes, lip heights, and handle designs. Match the replacement tray to the old tray’s outside dimensions and, when possible, the crate brand or model.
How do I measure a replacement dog crate tray?
Measure the old tray’s outside length and width, then check its depth, corner shape, and handle placement. If the old tray is missing, measure the clear opening and support rails inside the crate, then compare those measurements with the seller’s listed tray dimensions.
Can I use a metal tray in a wire dog crate?
You can use one only if it is designed to fit that crate and has smooth, safe edges. Metal trays may be heavier and noisier than plastic, and scratched finishes can rust. Do not use a pan that shifts or interferes with the door.
What should I do if my dog chews the replacement tray?
Remove a cracked or damaged tray immediately and inspect the dog for possible swallowed pieces. Persistent chewing may mean the crate should not be used unsupervised. Consider a more durable manufacturer-approved option and consult a veterinarian or behavior professional if the behavior is ongoing.